Showing posts with label Computer Tips & Tricks. Show all posts

Wednesday, 23 October 2013

How to Use Keylogger?

Here is a detailed tutorial which contains every possible information that you need to know about using the keylogger to monitor the activities of a computer. I know most of you are new to the concept of keylogger program. For some of you, this might be the first time you’ve heard about the term “keylogger”. So, to give you a clear picture and make you understand better, I would like to take up this post in the form of FAQs (Frequently Asked Questions). Here we go:
NOTE: I highly recommend that you read this post completely, since every single piece of information is important.

1. What is a Keylogger?

A keylogger (also called as spy software) is a small program that monitors each and every keystroke a user types on a specific computer’s keyboard. A keylogger program can be installed in just a few seconds and once installed, you are only a step away from getting the target password and other sensitive data.

2. How Keylogger works?

Once the keylogger is installed on a PC, it starts operating in the background (stealth mode) and captures every keystroke of the target computer.
Let’s take up a small example: The user on the target computer goes to http://mail.yahoo.com and types his “username” and the “password” in the respective fields to login. The keylogger silently records these keystrokes and stores them in the logs. These logs when opened up shows the captured “username” and “password“. Along with this, you will also be shown that they were typed in the Yahoo login page. Thus, the keylogger loads upon every startup, runs in the background and captures each and every keystroke.

3. How to install the keylogger?

A keylogger can be installed just like any other program. Just follow the screen instructions and you’re done.

4. Do I need any special knowledge to install and use the keylogger?

Absolutely NOT! Anyone with a basic computer knowledge can install and use the keylogger. It requires no special skills.

5. Once I install the keylogger, can the victim come to know about its presence?

No. The victim will never come to know about the presence of the keylogger on his/her computer. This is because, once installed, the keylogger will run in total stealth mode. Unlike other programs, it will never show up in the start-menu, windows startup, program files, add/remove programs or the task manager. So, the victim can no way identify its presence on his/her PC.

6. Can I be traced back if I install the keylogger on some other computer?

No, it’s almost impossible to trace back to you for installing the keylogger on other’s PC.

7. Which keylogger is the best?

Today, there exists hundreds of keyloggers on the market and most of them are no more than a scam. So, I have personally tested some of the top keyloggers and conclude SniperSpy as the best one:
SniperSpy – Compatible with Windows XP/Vista/7/8 and Mac

8. How SniperSpy works?

I will try to explain the working of Sniperspy in simple steps:
  1. After you purchase Sniperspy, you’ll be able to create the installation module using an easy set-up program. You need to email this module to the remote user as an attachment.
  2. When the remote user runs the module it’ll get installed silently and monitoring process will begin. The keystrokes are captured and uploaded to the SniperSpy servers continuously.
  3. You can login to your Sniperspy account (you get this after purchase) to see the logs which contains the password.

9. I don’t have physical access to the target computer. Can I still use SniperSpy?

Yes you can! SniperSpy supports REMOTE INSTALLATION feature which allows you to remotely install the program on any PC even if you have no physical access to it. For remote installation, all you need to do is just place the module (refer FAQ-8) in a .zip/.rar file and send it as an attachment to the target email address (for which you need the password).

10. Can I install SniperSpy on a local computer?

If you need to install to your local (current) computer instead of your remote computer, then the process is simple. Simply navigate to the folder in which you saved your module ( Refer FAQ-8). Double-click the module filename to execute it. Nothing will appear on the screen but the software gets installed silently.

11. What if the antivirus prevent from sending it as an email attachment?

Instead of sending the keylogger as an email attachment, it is recommended that you place the file in .ZIP/.RAR format and upload it to www.fileden.com. After uploading, just send the direct download link (FileDen allows hotlinking) to the victim via email. Once he downloads the file from this link and run it, the keylogger will get installed automatically.

12. Why SniperSpy is the best?

  • SniperSpy supports REMOTE INSTALLATION feature. This feature is not present on most of the keylogger programs.
  • SniperSpy is fully compatible with Windows 2000/XP/Vista/7/8 and also Mac.
  • SniperSpy can bypass any Firewall.
  • SniperSpy is more reliable than any other keylogger program. You need not rely on your email account to receive the logs. Instead, you can just log in to your online SniperSpy account to receive the logs.
  • SniperSpy captures full-size screenshots of the activities on the target PC.
  • Records BOTH sides of chats / IMs in Google Talk, Yahoo IM, Windows Live and more.
  • SniperSpy is more easy to install and requires no extra knowledge.
  • SniperSpy is recognized by BBC, CNN, CBS and other news networks. Hence, it is reputed and trustworthy.

13. How safe is to use SniperSpy?

Sniperspy is completely safe to use since all the customer databases remain confidential and private. SniperSpy do not collect any information from your system other than the information required for the product’s successful operation. They will not contact you in any way unless you request assistance.

14. Is my online order Safe and Secure?

Absolutely Yes! All the e-commerce transactions for SniperSpy is handled by Plimus – they are a trusted online retailer specializing in digitally delivered products. All your information remains private and secure. The safety and protection of your personal information is 100% guaranteed. So, you can place your order for SniperSpy with no worries of scam!
SniperSpy is completely reliable, safe and the best keylogger out there. It is really worth the price that you pay for it. I promise that you cannot get a better keylogger than this. So, what are you waiting for? Go grab SniperSpy now and expose the truth!

How Domain Name System (DNS) Works?

In the world of Internet and the area of computer networks, you will often come across the term Domain Name System or Domain Name Service which is simply referred to as DNS. The working of DNS forms one of the basic concepts of computer networks whose understanding is very much essential especially if you are planning to get into the field of ethical hacking or network security.
In this post, I will try to explain how Domain Name System works in a very simple and easy to follow manner so that even the readers who do not have any prior knowledge of computer networks should be able to understand the concept.

What is a Domain Name System?

A “Domain Name System” or “Domain Name Service” is a computer network protocol whose job is to map a user friendly domain name such as “Gohacking.com” to its corresponding IP address like “173.245.61.120″.
How Domain Name System (DNS) Works
Every computer on the Internet, be it a web server, home computer or any other network device has a unique IP address allotted to it. This IP address is used to establish connections between the server and the client in order to initiate the transfer of data. Whether you are trying to access a website or sending an email, the DNS plays a very important role here.
For example, when you type “www.google.com” on your browser’s address bar, your computer will make use of the DNS server to fetch the IP address of Google’s server that is “74.125.236.37″. After obtaining the IP address, your computer will then establish a connection with the server only after which you see the Google’s home page loading on your browser. The whole process is called DNS Resolution.
With millions of websites on the Internet, it is impossible for people to remember the IP address of every website in order to access it. Therefore, the concept of domain name was introduced so that every website can be identified by its unique name which makes it easy for people to remember. However, the IP address is still used as the base for internal communication by network devices. This is where the DNS comes in to action that works by resolving the user friendly domain name to its corresponding machine friendly IP address.
In simple words, domain names are for humans while IP addresses are for network devices. The “Domain Name System” is a protocol to establish a link between the two. Hence, it is not a surprise that you can even load a website by directly typing its IP address instead of the domain name in the browser’s address bar (give it a try)!

Types of DNS Servers and their Role:

The Domain Name System (DNS) is a distributed database that resides on multiple computers on the Internet in a hierarchical manner. They include the following types:

Root Name Servers:

The root servers represent the top level of the DNS hierarchy. These are the DNS servers that contain the complete database of domain names and their corresponding IP addresses. Currently, there are 13 root servers distributed globally which are named using the letters A,B,C and so on up to M.

Local Name Servers:

Local servers represent the most lower level DNS servers that are owned and maintained by many business organizations and Internet Service providers (ISPs). These local servers are able to resolve frequently used domain names into their corresponding IP addresses by caching the recent information. This cache is updated and refreshed on a regular basis.

How DNS Server Works?

Whenever you type a URL such as “http://www.gohacking.com” on your browser’s address bar, your computer will send a request to the local name server to resolve the domain name into its corresponding IP address. This request is often referred to as a DNS query. The local name server will receive the query to find out whether it contains the matching name and IP address in its database. If found, the corresponding IP address (response) is returned. If not, the query is automatically passed on to another server that is in the next higher level of DNS hierarchy. This process continues until the query reaches the server that contains the matching name and IP address. The IP address (response) then flows back the chain in the reverse order to your computer.
In rare cases where none of the lower level DNS servers contain the record for a given domain name, the DNS query eventually reaches one of the root name server to obtain the response.

FAQs about Domain Name System:

Here is a list of some of the FAQs about DNS:

How does a “root name server” obtain the information about new domains?

Whenever a new domain name is created or an existing one is updated, it is the responsibility of the domain registrar to publish the details and register it with the root name server. Only after this, the information can move down the DNS hierarchy and get updated on the lower level DNS servers.

What is DNS propagation?

Whenever a new domain name is registered or an existing one is updated, the information about the domain must get updated on all the major DNS servers so that the domain can be reached from all parts of the globe. This is called DNS propagation and the whole process can take anywhere from 24 to 72 hours to get completed.

How often the DNS servers are updated to refresh the cache?

There is no specific rule that defines the rate at which DNS servers should be updated. It usually depends on the organization such as the ISP that maintains the server. Most DNS servers are updated on an hourly basis while some may update their databases on a daily basis.
I hope you have now understood the working of DNS in a very convincing manner. Pass your comments and share your opinion.
This post is originally posted on GoHacking.com.

Sunday, 29 September 2013

How to Convert a Webcam into Spycam for Free?

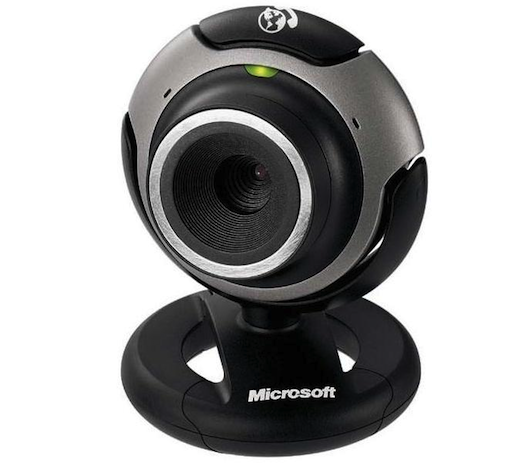
You can now easily monitor your room, office or workplace for activities going on during your absence without having to invest on expensive hidden cameras. If you’ve ever wondered to find a way to turn your PC webcam into a spy camera, here is a simple and effective solution. This can be really handy to monitor your children and pets in home or even catch a cheating spouse red handed! For this, all you need is a computer with an Internet connection and a webcam attached to it.
If your computer meets the above simple requirements, then you are all set to go. The site called UGOlog.com provides a free solution to simply transform your webcam into a powerful spy camera in just a few steps. You can sign-up for a free account and start using the service immediately.
Since UGOlog service runs as a web application from within the browser, there is no need to install any additional software on your computer. That means, when your spouse or children look through the installed programs, they don’t find anything that arouses suspicion.
UGOlog-Recording
The following are some of the advantages of using UGOlog service over other software programs or a conventional spy camera:
  • Firstly, the service comes for free, so that you don’t need to buy anything to start with.
  • Unlike software programs such as “Webcam Monitor” which is complicated to configure and lacks stealth operation, UGOlog needs no installation and is simple to setup.
  • UGOlog comes with powerful features such as as motion detection, email alerts, and interval snapshots.
  • You have the option to view the camera remotely from anywhere just by logging into your UGOlog account.
UGOlog-Watch
Once you’ve created your account, you can take up a quick tour and browse through the configuration guide to begin using the service. The free version of UGOlog limits the service for only 1 webcam and 50 MB of storage space. If you wish to setup more than one camera and need additional space for recording more videos, you can easily switch for paid plans as per your convenience.
This post was originally posted on GoHacking.com.

Wednesday, 18 September 2013

Programming: How to Make a Virus to Restart Computer?

In this post, I will show you how to create a virus to restart the computer at every startup. That is, upon infection, the computer will get restarted every time the system is booted. As a result, the computer will become inoperable as it reboots again as soon as the desktop is loaded.
For this, the virus needs to be executed only once and from then on, it will carry out rest of the operation on its own. I have programmed this virus using the C language. If you are familiar with the C language then it is too easy to understand the logic behind the coding. The code is not posted here in this article, but you can download it from the link below.

Compiling the source code into an executable module:

  1. Download the Source Code Here.

  2. UnRar the file and you should see the source code: Sysres.C
  3. For a step-by-step compilation guide, refer the post: How to compile C Programs?

Testing and removing the virus from your PC:

You can compile and test this virus on your own PC without any fear. To test, just double-click the sysres.exefile and restart the system manually. From now on, every time the PC is booted and the desktop is loaded, your PC will restart automatically again and again.
It will not do any harm apart from automatically restarting your system. After testing it, you can remove the virus by following the below mentioned steps:
  1. Reboot your computer in the safe mode.
  2. Go to:
    %systemroot%\Windows\System
    (%systemroot% can be C,D,E or F)
  3. You will find a file by name sysres.exe, delete it.
  4. Type regedit in run. You will go to the registry editor. Here navigate to:
    HKEY_CURRENT_USER\Software\Microsoft\Windows\ CurrentVersion\Run
    There, on the right site you will see an entry by name “sres“. Delete this entry. That’s it. You have now removed this virus successfully.

Logic Behind the working of this virus program:

If I do not explain the logic(Algorithm) behind the working of the virus program, I think this post would become an incomplete one. So I’ll explain the logic in a simplified manner without getting much into the technical aspects of the program. If you have further doubts, you can pass your comments.
LOGIC:
  1. First the virus will find the Root partition (Partition on which Windows is installed).
  2. Next, it will determine whether or not the virus file (sysres.exe) is already copied into%systemroot%\Windows\System.
  3. If not it will just place a copy of itself into %systemroot%\Windows\System and makes a registry entry to put this virus file into the Windows startup.
  4. Or else if the virus is already found in the %systemroot%\Windows\System directory (folder), then it just gives a command to restart the computer.
This process is repeated every time the PC is restarted.
NOTE: The system will not be restarted as soon as you double click the Sysres.exe file.The restarting process will occur from the next boot of the system.

How to change the icon of the executable module (This step is optional):

After you compile, the sysres.exe file that you get will have a default icon. If you send this file to your friends they may not execute it since it has a default ICON. So it is possible to change the ICON of this Sysres.exe file into any other ICON that is more trusted and looks attractive.
For example, you can change the icon into Norton antivirus ICON itself so that the people seeing this file believes that it is Norton antivirus. Or you can change its ICON into the ICON of any popular or trusted programs so that people will definitely click on it.
The detailed tutorial on changing the ICON is given in my post How to Change the ICON of an EXE File?
WARNING: This code is for Educational Purposes only, do not MISUSE it!
This post was originally posted on GoHacking.com.

How to Change the Icons of .exe Files?

Some times it becomes necessary to change the icon of an executable file so that the file gets a new appearance. Many of the tools such as TuneUP Winstyler does this job by adjusting the Windows to display a custom icon to the user. But, in reality if the file is carried to a different computer, then it shows its original icon itself.
This means that in order to permanently change the icon, it is necessary to modify the executable file and embed the icon inside the file itself. When this is done the executable file’s icon is changed permanently, so that even if you take file to a different computer it show’s a new icon.
For this purpose I have found a nice tool which will modidify the executable file and embed the icon of your choice into the file itself. ie: The tool changes the icon of the executable file permanently.

How to Change the Executable File Icon?

Here is a step-by-step instruction on how to use this tool to change the icon of any EXE file:
  1. Go to www.shelllabs.com and download the trial version of IconChanger and install it (Works on XP, Vista and Win 7).
  2. Run the IconChanger program from Start -> All Programs and you should see an interface as shown below:
    Change EXE File Icon
  3. Now you will see a window stating that “Choose an object whose icon you want to change”. Click on the “OK” button.
  4. Now select the executable file for which you wish to change the icon.
  5. Icon changer will automatically search for all the icons on your “C:\ drive” so that you can select any one of those. If your desired icon is not shown in the window, you may paste the path of your icon file in the field which says “Search icons in” so that your desired icon gets displayed.
  6. Select the ICON of your choice and click on Set button.
  7. Now a popup window will appear and ask you to select from either of these two options.
    • Change embeded icon.
    • Adjust Windows to display custom icon.
  8. Select the first option (Change embedded icon). You are done. The icon gets changed.
I hope you like this post. Pass your comments in case if you have any queries or clarifications.
This post was originally posted on GoHacking.com.

Featured


© 2013 GEEK's Radar. All Rights Resevered by the Original Owners of thr Data and/or Information and/or Stats used on this Blog. Designed by Templateism

Back To Top